Category Archives: DIY

I wanted to share a very sweet idea that happened on this Mother’s Day wedding.

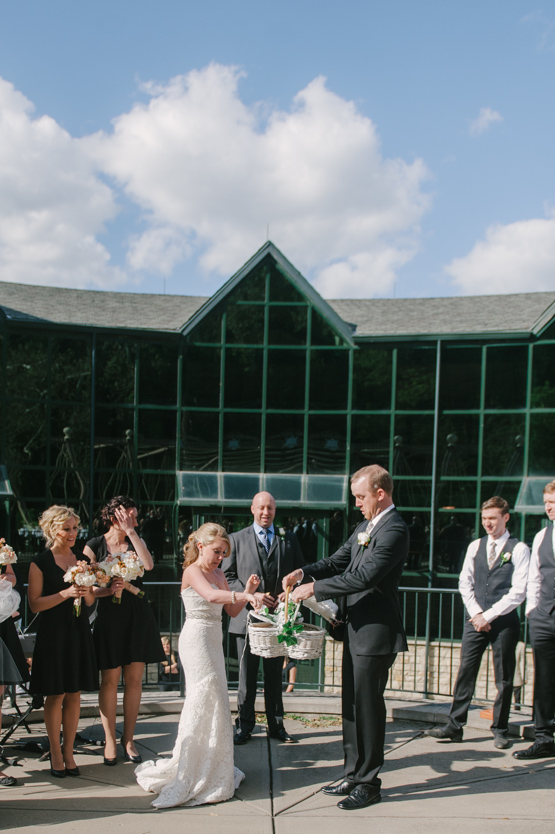
Kevin & Erin met while performing A Midsummer Night’s Dream in Colorado. Their intimate Carillon Historical Park wedding ceremony was emotional as well as entertaining… they are actors after all!
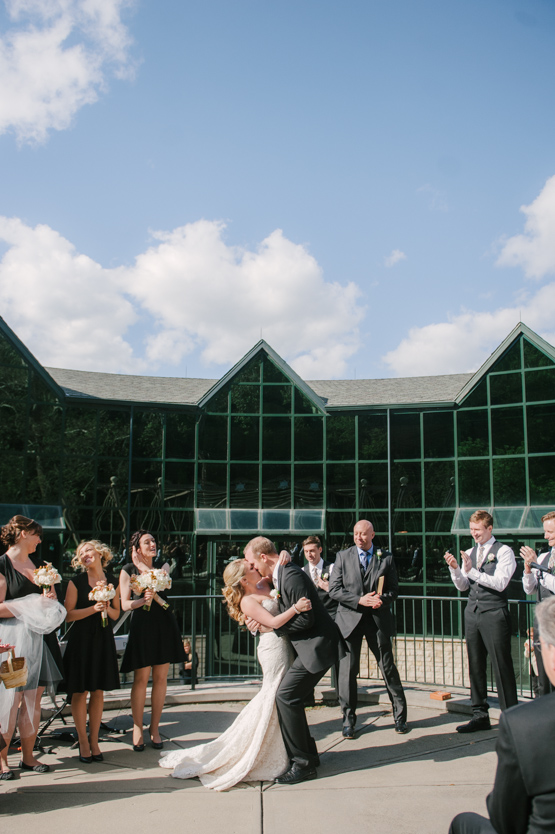
Their ceremony ended with a twist, or shall we say, feathers!

Kevin’s sister, Karlen, approached me at the rehearsal to let me know that a guest who couldn’t come to the wedding arranged for a dove release, but kept it a secret from the bride & groom. She explained that after the kiss, the best man would hand them a basket. Not knowing what was in the basket, they opened it and this happened:

 Isn’t that the best?

Surprise Dove Release /// AndreaDozier.com
Surprise Dove Release at the End of a Wedding /// AndreaDozier.com

Surprise Dove Release at the End of a Wedding /// AndreaDozier.com
Carillon Park Wedding in Dayton, Ohio /// AndreaDozier.com

Cheers to 2013 Weddings! ♥

PS Can’t thank Karlen enough for giving me the details about this little secret! I’m so glad to have been ready for it!

Pin It
  • Michelle - June 9, 2014 - 2:20 pm

    I am looking for a white dove release for my wedding this August. I am having the worst luck finding a company that does dove releases in the dayton area! If you could help me out that would be greatly appreciated!

The other day, my almost seven year old, Kevin, surprised me with a question.
“So mom, did your life turn out how you planned it to?”

I asked him to repeat himself a few times because I was stammering to answer my restless philosophical twin.
Of course, what I dreamed as a girl does seem very abstract compared to what it’s like to have my own little boys.
They are exactly what I hoped for as well as the cosmic force that blindsided me at first cry. Twice.

I wanted baby scented dolls.
Instead my heart has been threaded and sewn into a primal devotion
that will never know any man made condition or exception.

It scares, saves, humbles, motivates, exhausts, and empowers me.

I’m not sure what I said to answer him.
He cut short my rambling by pinching me for not wearing green.
He said nail polish doesn’t count.

Love that kid.

Star Wars BIrthday Party \\\ Yoda Soda \\\ AndreaDozier.com
Kevin turned Seven on Saturday.

We plan to celebrate his birthday later this spring when all of our family can be in town together,
but we still wanted him to feel special on his actual birthday.
Enlisting the help of family, we had a small dinner with a Star Wars theme.
He’s been obsessed with Jabba the Hutt this year and all Star Wars Lego sets.

Star Wars BIrthday Party \\\ Jabba the Hutt Cake \\\ AndreaDozier.com
Star Wars BIrthday Party \\\ Yoda Soda \\\ AndreaDozier.com
Star Wars BIrthday Party \\\ AndreaDozier.com
Kevin was able to Skype with Daddy first thing in the morning. Love how excited he was to do it.
Kevin Turns Seven | Star Wars Style

Star Wars BIrthday Party \\\ Yoda Soda \\\ AndreaDozier.com
Kevin Turns Seve | Star Wars Style
After I covered the cake with the crumb coating, I realized I loved the texture… and left it alone.
Perfect for Mr. Hutt.
Star Wars BIrthday Party \\\ Jabba the Hutt Cake \\\ AndreaDozier.com

Star Wars BIrthday Party \\\ Jabba the Hutt Cake \\\ AndreaDozier.com

My mother-in-law treated us to “Yoda Soda,” something she found on Pinterest.
She made ours with a scoop of lime sherbet & Sprite.

Star Wars BIrthday Party \\\ Yoda Soda \\\ AndreaDozier.com

Star Wars BIrthday Party \\\ Yoda Soda \\\ AndreaDozier.com

Star Wars BIrthday Party \\\ Yoda Soda \\\ AndreaDozier.com

My sister-in-law found really cute Star Wars favors and decorated for us.
Kevin wanted to be “Lego Dude General.”

Star Wars BIrthday Party \\\ Star Wars Party Favors \\\ AndreaDozier.com
She also thought to use these Star Wars Easter Egg as favors. They were perfect!
Star Wars BIrthday Party \\\ Star Wars Darth Vader Easter Eggs \\\ AndreaDozier.com

Star Wars BIrthday Party \\\ AndreaDozier.com

Star Wars BIrthday Party \\\ AndreaDozier.com
A very kind person who works with my husband sent a box of Star Wars figurines for Kevin.
We will treasure them, thank you!

Star Wars BIrthday Party \\\ AndreaDozier.com

My mother-in-law also found a cute DIY on Pinterest for making Pool Noodle Light Sabers.
They were a huge hit for the boys. Especially on the snowy day after the party!

Star Wars BIrthday Party \\\ DIY Pool Noodle Light Sabers \\\ AndreaDozier.com

Star Wars BIrthday Party \\\ DIY Light Sabers with Pool Noodles \\\ AndreaDozier.com

Star Wars Party >>> AndreaDozier.com

Star Wars BIrthday Party \\\ DIY Pool Noodle Light Sabers \\\ AndreaDozier.com

Star Wars BIrthday Party \\\ AndreaDozier.com
The day of Kevin’s birthday was chaotic, fun, and fast paced day so I just took iPhone pictures.
I took advantage of the quiet Sunday {with Damian napping} to photograph many of the details I posted.
Kevin and I were almost finished and he wanted me to get a picture of him “using the force,” on a balloon.

It was tricky!

I thought that a little gif {made it on an app called Gif Boom} would be perfect for our attempts…

AndreaDozier.com

Today is a snow day & closed school.
I think these two will find plenty to do to keep me on my toes.

Thanks for following along with us, it’s hard to believe that when I started this blog Kevin was three! ♥

Find me on Instagram // Pinterest // Facebook // Twitter
@AndreaDozier


Pin It
  • Justine - March 25, 2013 - 7:35 am

    What a sweet party! Simple and rad. He’s a lucky man. Hope I see you soon. =)

  • Andrea - March 25, 2013 - 8:56 am

    Thanks Justine! My mother-in-law and sister-in-law had all the cool ideas, I just got to enjoy the whirlwind with the kids! Can you tell I LOVED your gold balloons?! 😀

  • […] at I’m Topsy Turvy created. Also scope out wedding photographer Andrea Dozier’s hilarious Jabba the Hutt cake, which made me laugh out loud when I first saw it. (Top your cake with a Pop! Star Wars: Jabba the […]

Don’t you love when you see a Pin that seems like something you can actually do?
I saw this “Anti-Pinch Polish” St. Patty’s Day gift idea on Pinterest
and fell in love with the idea!

Here is my own little label for my two favorite shades of green nail polish.
I had fun painting nails with my sisters!

St. Patrick
St. Patrick
St. Patrick

St. Patrick
St. Patrick

St. Patrick

St. Patrick

St. Patrick
St. Patrick
St. Patrick
St. Patrick
St. Patrick

St. Patrick
My “model,” is my gorgeous sister Abby. Many of you will recognize her as my assistant at weddings this past year.
I’m so happy to have her on my team and will share more about that this Spring! ♣

Find me on Instagram // Pinterest // Facebook // Twitter // Vine
@AndreaDozier


Pin It
  • Sofia - March 11, 2013 - 11:51 am

    This is really cool!! Oh and BTW your sister is gorgeous!!!!

  • Anna @ IHOD - March 11, 2013 - 4:38 pm

    I love this idea Andrea! And the photos are perfectly done:D
    This would be so fun to make or give to friends.
    x, Anna

  • Katie O'Keefe - March 16, 2013 - 7:52 am

    This is such a cute idea! I would love to make these as gifts for my co-workers. Love it, and have a great weekend!

  • […] what I said to answer him. He cut short my rambling by pinching me for not wearing green. He said nail polish doesn’t […]

  • Andrea - March 25, 2013 - 9:09 am

    Thanks ladies! I had a lot of fun doing this and I love getting to hang out with my sisters while I work! 🙂

Happy Valentine Eve.

I’ve been inspired by all the Pinterest pins about DIY canvas photos using Modge Podge glue and swore I’d make one someday.
Of course that never happened.
After I came across mini canvases with easels at JoAnn Fabrics a couple years ago, I thought it would look great in a petite version.
It’s a sweet little project that requires minimal planning, and is perfect for your wedding or engagement pictures.

Check out Mark & Jenn’s entire wedding post, here.

DIY Mini Canvas with Wedding Photos by AndreaDozier.com

Materials:

  • Mini Canvas – I’ve come across them at JoAnn Fabrics & Walmart. Walmart sells them in sets with the wooden easels, JoAnn lets you pick and choose them separately. I recommend getting them separately if you’d like to pick up more canvases than easels or want a variety of sizes.
  • Easel
  • Modge Podge & Old Paintbrush
  • Scissors or X-Acto Knife
  • Ruler
  • Awesome Picture

DIY Mini Canvas with Wedding Photos by AndreaDozier.com

First, I measure the canvas to make sure I order the correct size photo print.
Mine were 3.5 inches by 2.5 inches, so two fit just perfectly in a 4 x 6 print.

I used InDesign to set up a 4 x 6 inch document and resized my images to fit inside two 3.5 x 2.5 rectangles.
I’ve made these several times as gifts to friends & family, and I always order at least two extra prints.
Just in case the knife slips while I’m cutting or some other little disaster.

DIY Mini Canvas with Wedding Photos by AndreaDozier.com

Cut the photographs to size.

DIY Mini Canvas with Wedding Photos by AndreaDozier.com

Line up the photograph on the canvas that it will be glued on top of.
Make sure it is a good fit and doesn’t need trimmed {sometimes the canvases can be irregular shapes or my cutting is not quite perfect}.

Lay the trimmed picture on the canvas.
You have a moment or two to slide it around and set it so that it is centered.
Use a tissue to press the image on the canvas gently.
Leave it alone and let it dry for about five minutes.Using a paintbrush, brush a layer of the Modge Podge glue on the canvas.

DIY Mini Canvas with Wedding Photos by AndreaDozier.com
Easy enough for a two year old to do.
Ha. He was jealous that I was making a mess so I invited him to join me as a bribe to keep him happy until I finished.

DIY Mini Canvas with Wedding Photos by AndreaDozier.com

I like to make mine with a little bit of texture to mimic a painting.
I do this by painting on the front of the image.
It will feel scary to brush white Modge Podge on your photograph, but it won’t stay that way.
The glue goes on white and dries clear.
My personal rule is that I like to make sure that skin on faces is clear, and I use more texture on the outer edges.
I added a tiny bit of glitter dust to my family Christmas picture canvas and a friend told me her daughter made one with a lipstick kiss!

DIY Mini Canvas with Wedding Photos by AndreaDozier.com
Thanks to Mark & Jenn for stepping out at sunset of their Cincinnati wedding so I could capture that gorgeous moment of them!
DIY Mini Canvas with Wedding Photos by AndreaDozier.com

Prints $.45

Canvas $1.00

Easel $1.00

Modge Podge about $8 {you will only use about a teaspoon of the bottle}

DIY Mini Canvas with Wedding Photos by AndreaDozier.com
Here’s a bonus image of one I made a year ago for my husband. I scanned an old photograph & had it reprinted.
Love seeing his Grandma holding him next to my kitchen sink!
They are great gifts for guys & you can make a few at a time so that you can switch them out seasonally.

DIY Mini Canvas with Wedding Photos by AndreaDozier.com

Here is a little behind the scenes video I made with the Vine App of this process:

This is definitely not a new concept, but I hope someone feels inspired! ♥

Find me on Vine // Instagram // Pinterest // Facebook // Twitter
@AndreaDozier

Pin It
  • alli - February 13, 2013 - 1:40 pm

    Absolutely love this! I always want to buy those little canvases at the store. The one with the old photograph is perfect. : )

  • Andrea - February 13, 2013 - 6:28 pm

    Thanks Alli! I was so drawn to them too, they are so versatile & adorable! One Christmas I made several of them with vintage photographs like this for gifts and it was so fun. Also love how easy it is to add new ones each season!

  • eric von lehmden - February 18, 2013 - 8:41 am

    That is so cool. I work with Canvas Press (we print photos onto canvas) and it is always great to see people’s creativity and enthusiasm for putting their own photos on canvas. Let me know if we can ever help with a project of yours or just give us a shout to chat about what we do. Great post!

  • […] and Forks: jessicaNdesigns Table Thank You Cards: WeddingsByJamie You might remember them from a Mini Canvas DIY I posted in February, check it out […]

  • Collin - May 1, 2013 - 11:12 pm

    You have shared an excellent DIY Mini Canvas for Wedding Photo, i like this unique idea, many thanks for sharing this great DIY project..

    how to find and appoint a good wedding photographer
    http://makeyourideasart.com/photography/how-to-find-and-appoint-a-good-wedding-photographer/

As promised, here is a full tale of making a Kraken Birthday Cake.
I’ve been so temped to write “cake” with a “k” in the title.

I started baking early in the week, to give myself plenty of time to bake & decorate this cake that would be so perfect for my six year old, Kevin. He adores Krakens. He always loved Finding Nemo as a toddler & that grew into a wild fascination with underwater creatures. Especially squids & sharks. For some reason, the squids have been an obsession for a long time. When I found this cake on Pinterest, it was unanimous that this was “the one” to make. Before I even begin, I have to give Vina Jafar a lot of credit. She made her version based on a drawing. I had my iPad out at all times & made mine based on every step she had photographed from her own cake. I think it takes a lot of creativity & admiration to bake a cake from three dimensional from a drawing. I clearly took her design as my bible.
Major love goes out to Vina & the beautiful creation, “Long Journey.” If you look closely, her details {especially her ship} are phenomenal!

I documented most of the major steps through photography. My mom always enjoys the process of how something is created, so I hope you enjoy this 😉

It all started with a six eight inch layer cake. I was nervous about carving into it since it was my first time, but I really enjoyed this part & it was one of my favorite steps!

After letting the cake defrost overnight, I noticed that it was leaning forward… in the worst possible way! It looked like the heavy, carved part of cake would make it fall forward. After taking Kevin to school {a 45 min round trip} & grabbing a cup of coffee, I decided think about my options. I had a small pep talk with myself & finally concluded that even if I had to dress up a couple cake dummies in fondant, everything would be ok.

CAKE DUMMIES!

I quickly formulated a plan to make a cake dummy wedge so that my leaning cake would straighten up with support.
First, I quickly Googled, “how to cut a cake dummy” and was on my way to salvaging this kraken cake.
Here are some iPhone pics of this process {since you know I was too worried to move the cake & take pretty pictures}!

First I cut a rough wedge in a 2 inch cake dummy {no measuring or fancy estimations… just winging it}. Then I covered the newly cut Styrofoam with Crisco so that the pieces wouldn’t get in the cake. I moved the cake to rest on the cake dummy wedge & began trimming the front down even further. Instead of carefully carving like I did the day before, it was all quick & drastic chopping to remove some of the weight. Then I did another coat of buttercream before I rolled the fondant.
I’m tired & stressed just re-capping this part of the story! It definitely felt like a Tim Gunn “make it work” situation. 😉

Here is the more polished coverage of the cake baking process from that week… that thankfully… went a lot smoother!

After saving the leaning cake, I let the buttercream dry a bit too much. Since I’m not a professional baker, {I figured the guests would forgive me}, I did something on a whim… sprayed the cake with Baking Spray to get the fondant to stick. I don’t really know if it helped, but I felt more optimistic after I did it!

The fondant was probably rolled too thick, so when I covered the cake it instantly weighed it down {as you can see the dowel rods poking out}. My husband, Rocky, cut them later for me. The next step was to make fondant & gumpaste kraken parts & extra waves. Then I attached them to the cake with icing. I liked it in all white and would love to do another cake sculpture with a modern style in the future.

On Vina’s site, she uses a food marker to make her lines. I tried that, but it didn’t go very well. Maybe because the food marker was 3 years old? My solution was to mix extra buttercream icing with piping gel & dip that in vanilla extract to make it thin enough to paint with. It wasn’t ideal, but I was happy to have a relatively easy way to add dark lines.

Painting was a bit stressful, I kept wanting to be further on this cake than I actually was. Around this time, Kevin told me he found a flower more beautiful than roses. I asked him to pick one for me… and this gave me new inspiration to keep going. It helped me remember why I wanted to make him something he would like that would be unique to him!

I had never used food spray paint, and I was excited & nervous to do it! Especially because I had accidentally fallen in love with the {imperfect} Dr. Suess style of the painted lines on the waves. I didn’t know if I even wanted blue waves, but I had already bought the materials & decided to go for it. I honestly would leave it alone or spray even more delicately if I did this cake {or one similar} the next time.

For his party, I made a boats to hang above the cake as if they were the ones that sailed in safer waters.
You can find the complete DIY on how to make these beautiful paper mache boats {out of cereal boxes!} on Ann Wood Handmade’s blog. She also sells way more beautiful versions than the ones I made 🙂

 This year he actually had a decorated cake {unlike last year when I ran out of time}!
Thanks for reading this extra long post ♥

This is a shot of Kevin playing with the cake & putting his Pirates of the Caribbean legos on it 🙂

 

Pin It
  • Elle Ruiz - April 19, 2012 - 5:17 pm

    Andrea that is & YOU are AMAZING. Is there anything you don’t do that is just sooooo pretty? Even your baking shoes are just darling. Loved this post! Thanks for sharing a slice of your personal life. xo

  • katie's pencil box - April 20, 2012 - 4:03 am

    what a lucky lucky boy to have such a mama!
    i adore your style, miss!

  • Alli - April 20, 2012 - 2:30 pm

    oh my word, this is amazing! And you are adorable : )

  • Andrea - April 21, 2012 - 7:30 am

    Thank you {I admire all of YOU by the way}!

    It really was a very long project since I tend to work very slowly… but a lot of fun for me to just throw myself into it for the week. I think it helps that it’s a cake & not a real permanent sculpture… I could live with my mistakes much easier 🙂