Valentines crept up on us quickly this year. Ours was a busy with a very fun shoot for me, haircuts for the boys, homework, card writing, and Chipotle for dinner. They both had parties and got to come home armed with sweets & cards. Nothing handmade here, I copped out with Mickey Mouse {for Damian} and Lego Star Wars Valentines {for Kevin}.
    I bought myself some {droopy} white tulips and have been daydreaming about spring ever since.

    Red Velvet Cupcakes with Cream Cheese Icing | AndreaDozier.com
    Red Velvet Cupcakes with Cream Cheese Icing | AndreaDozier.com

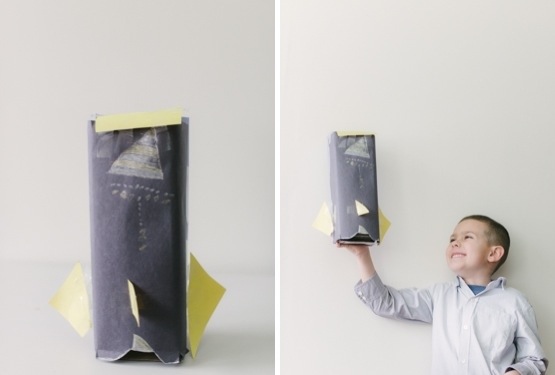
    Last year Kevin & I made a sailboat Valentine box. This year the class decorated bags but he insisted on making a Spaceship box.
    He is truly a child after my own heart.

    Red Velvet Cupcakes with Cream Cheese Icing | AndreaDozier.com

    I’m starting to collect too many coffee mugs.
    Damian’s hands are almost the size of mine.

    Red Velvet Cupcakes with Cream Cheese Icing | AndreaDozier.com
    Red Velvet Cupcakes with Cream Cheese Icing | AndreaDozier.com
    Red Velvet Cupcakes with Cream Cheese Icing | AndreaDozier.com
    Red Velvet Cupcakes with Cream Cheese Icing | AndreaDozier.com

    Red Velvet Cupcakes with Cream Cheese Icing | AndreaDozier.com

    Red Velvet Cupcakes with Cream Cheese Icing | AndreaDozier.com

    Red Velvet Cupcakes with Cream Cheese Icing | AndreaDozier.com

    We had a family birthday so I jumped at the chance to make Red Velvet Cupcakes with Cream Cheese Icing. Around Christmas time I stumbled across Vanilla Bean Curd, so I added that to my frosting instead of vanilla. It helped give them the flavor I wanted & maintain a thickness that makes it easier to pipe and decorate. Definitely plan on using it in more frostings in the future.

    Cream Cheese Icing Recipe

    • 2 Packages of Cream Cheese {softened}
    • 2 Sticks of good quality butter {softened} <<< I use Land of Lakes unsalted.
    • 4 Cups Powdered Sugar
    • 2 Tablespoons Vanilla Bean Curd
    • Food Coloring {optional}

    Cream butter & cream cheese until it becomes a soft paste without lumps. Slowly add powdered sugar, one cup at a time on low mixing speed. Add vanilla curd & food coloring. Cream Cheese icing can be tricky and sometimes needs more or less powdered sugar, and possibly a few minutes in the freezer to thicken up {especially in the summer when kitchens are hot}. Also great as a fruit dip.

    My piping skills are pretty rusty so it took a few tries to even get the one semi-acceptable rose topping you see. After I wiped off the cupcake to re-try, I kind of fell in love with the faux painted brushstrokes.
    Might be inspiration for a new batch of cupcakes.

    Red Velvet Cupcakes with Cream Cheese Icing | AndreaDozier.com

    Hope your weekend was sweet! ♥


     Find me on Instagram // Pinterest // Facebook // Twitter // Vine
    @AndreaDozier


    Pin It
    • Erin Davenport - February 19, 2013 - 3:13 pm

      What a lovely day! Beautiful icing work, looks delicious. Your kiddos are adorable 🙂

    • Justine Worthington - February 20, 2013 - 3:36 pm

      Oh man those tulips never took off? So sad! Even droopy tulips are pretty, I think. =) And I think we need a baking day or three sometime soon. I’ve dabbled in hobby-level cake baking and decorating and see that you are going to be my perfect partner in crime! See you soon. xoxo

    • Andrea - February 26, 2013 - 10:08 pm

      Thanks Erin! I’m so excited for you & to watch your gorgeous little one grow!

    • Andrea - February 26, 2013 - 10:14 pm

      Justine, they did better than they would have if you weren’t there to help! Yes, bring on the baking! I don’t do it enough anymore & I miss it. Plus it’s way better when you have people to share it with! 🙂

    20130215-102621.jpg

    Little Andrea,

    It’s ok to wear cardigans and use words like “enamored.”
    Someday you’ll miss roller skating in your cement basement & shaking the backyard apple blossoms with your brother.
    The teddy bear comforter that matched the one on Full House will feel like a foreign object from another life.

    You’ll grow out of that tired old voice that never liked your round face or flat feet.
    After a while you realize you just don’t have time to dislike yourself so much.
    When you understand how to hold yourself in high esteem, it will come back to you.

    Learning to cherish & nurture yourself is the secret to growing an abundance of healthy love you can freely give away.
    For goodness sakes, get some sleep. Eat nicely.
    Give yourself a good portion of the grace you give to others.
    Respect yourself enough to know when to humbly make changes.

    Cling to the truth that life is a lovely thing.
    When the world offers a bitter cup, do not drink from it.
    Hearts are meant to be strong, but they don’t need to be hard.
    Accepting the risk of a vulnerable soul will cultivate poise.

    Forgive often.

    Never let anyone else make up your mind for you.
    They may hover around the fringe of your life,
    but the living of it is yours.
    Not theirs.
    Ask for wisdom but trust yourself.

    Chasing gorgeous light & breathtaking sunsets will never cease to thrill us.
    Thunderstorms will always make us uneasy.
    Those bangs will always give us trouble.
    You’ll discover that pink isn’t such a bad color after all.

    I’ve spent a lot of time analyzing who you are, what has happened since then, and who we are now.
    I’d like to think that at this point we’ve made peace.
    Secret handshake & high fives, it’s for real.

    -29 year old Andrea

    dear little andrea | AndreaDozier.com

    20130215-102627.jpg

    ps: I want your swimsuit. ♥

    Inspiration for this post:

    We are celebrating Valentine’s Day by writing love letters to our little selves. This idea stems from one of my favorite quotes by Kris Carr, “Picture yourself when you were five. in fact, dig out a photo of little you at that time and tape it to your mirror. How would you treat her, love her, feed her? How would you nurture her if you were the mother of little you? I bet you would protect her fiercely while giving her space to spread her itty-bitty wings. she’d get naps, healthy food, imagination time, and adventures into the wild. If playground bullies hurt her feelings, you’d hug her tears away and give her perspective. When tantrums or meltdowns turned her into a poltergeist, you’d demand a loving time-out in the naughty chair. From this day forward I want you to extend that same compassion to your adult self.” This Valentine’s Day, take time to write little you a love letter. What are three things you would tell yourself? Show yourself some fierce love this month. ♥

    Maiedae Blog by Savannah

    Find me on Vine // Instagram // Pinterest // Facebook // Twitter
    @AndreaDozier

    Pin It
    • emma - February 15, 2013 - 10:40 am

      your website is inspiring i looked at it firstly because my husband is away for four weeks and my four children just got foot and mouth all at the same time and i was looking for remedies to soother their blisters we just moved to thailand for my health i have had 12 operations on aistralia in the last 4 years to no avail and for some reason found that i didnt need nearly as much morphine to cope whilst here your blog has made me homesick you website the look of it reminded me of all the time i tiik to make my home have the same feel your site does i miss all those pretty little things and life since we got here has been so stressful i miss my focus being on capturing but most importantly making the memories you document maybe i will make a site to record this journey of ours not very good at compuiter things but i will try please feel free to contact me back it is a bit lonely over here and for me style and function of things is what makes life that more precious but there isnt much of that in thailand i even had a shop in aistralia full of handmade things for everywhere in your house to just add some wonder i would love to hear from you if you have time

    • Jaclyn - February 15, 2013 - 4:07 pm

      Awww….i’ve been trying to tell you this for a while (loving yourself, that is)! i needed this today….and thanks for letting me know about the free books!! i lost my charger, though…but as soon as i find it, i will start reading it 🙂

    • Katie Swift - February 16, 2013 - 7:00 am

      I love this. It’s amazing how much we grow after we have children and realize that our childhood is truly over. Bittersweet but you definitely made it sweet in your post!

    • Andrea - February 26, 2013 - 10:17 pm

      Emma, wow thank you! I’m so glad you feel that way about coming “here,” but I’m so sorry you’ve had your hands really full lately! I hope they recover soon! You should definitely try to capture some memories, because clearly they are unique! It is hard to balance enjoying the moment with children & sharing it. I’m constantly trying to get better at it! Thanks so much for letting me know you were here & saying hi! Hope you are getting settled & feeling at home soon!

    • Andrea - February 26, 2013 - 10:18 pm

      Jaclyn, glad it was encouraging for you! Love her books, I’ll be sad to finish them all {including other works of fiction}!

    • Andrea - February 26, 2013 - 10:21 pm

      Katie, thank you! I completely agree about pondering these things after we have children and realize they are not babies anymore than we are! Believe me, I could write a book about the bitter parts. It was honestly hard to refrain from nit picking & releasing everything I regret. But that’s not really very productive & I really do try to see life for what it is… then take the good from it. Otherwise I wouldn’t have even got over the frustration of having flat feet. Ha.

    Happy Valentine Eve.

    I’ve been inspired by all the Pinterest pins about DIY canvas photos using Modge Podge glue and swore I’d make one someday.
    Of course that never happened.
    After I came across mini canvases with easels at JoAnn Fabrics a couple years ago, I thought it would look great in a petite version.
    It’s a sweet little project that requires minimal planning, and is perfect for your wedding or engagement pictures.

    Check out Mark & Jenn’s entire wedding post, here.

    DIY Mini Canvas with Wedding Photos by AndreaDozier.com
    DIY Mini Canvas with Wedding Photos by AndreaDozier.com

    Materials:

    • Mini Canvas – I’ve come across them at JoAnn Fabrics & Walmart. Walmart sells them in sets with the wooden easels, JoAnn lets you pick and choose them separately. I recommend getting them separately if you’d like to pick up more canvases than easels or want a variety of sizes.
    • Easel
    • Modge Podge & Old Paintbrush
    • Scissors or X-Acto Knife
    • Ruler
    • Awesome Picture

    DIY Mini Canvas with Wedding Photos by AndreaDozier.com

    First, I measure the canvas to make sure I order the correct size photo print.
    Mine were 3.5 inches by 2.5 inches, so two fit just perfectly in a 4 x 6 print.

    I used InDesign to set up a 4 x 6 inch document and resized my images to fit inside two 3.5 x 2.5 rectangles.
    I’ve made these several times as gifts to friends & family, and I always order at least two extra prints.
    Just in case the knife slips while I’m cutting or some other little disaster.

    DIY Mini Canvas with Wedding Photos by AndreaDozier.com

    Cut the photographs to size.

    DIY Mini Canvas with Wedding Photos by AndreaDozier.com

    Line up the photograph on the canvas that it will be glued on top of.
    Make sure it is a good fit and doesn’t need trimmed {sometimes the canvases can be irregular shapes or my cutting is not quite perfect}.

    Lay the trimmed picture on the canvas.
    You have a moment or two to slide it around and set it so that it is centered.
    Use a tissue to press the image on the canvas gently.
    Leave it alone and let it dry for about five minutes.Using a paintbrush, brush a layer of the Modge Podge glue on the canvas.

    DIY Mini Canvas with Wedding Photos by AndreaDozier.com
    Easy enough for a two year old to do.
    Ha. He was jealous that I was making a mess so I invited him to join me as a bribe to keep him happy until I finished.

    DIY Mini Canvas with Wedding Photos by AndreaDozier.com
    DIY Mini Canvas with Wedding Photos by AndreaDozier.com

    I like to make mine with a little bit of texture to mimic a painting.
    I do this by painting on the front of the image.
    It will feel scary to brush white Modge Podge on your photograph, but it won’t stay that way.
    The glue goes on white and dries clear.
    My personal rule is that I like to make sure that skin on faces is clear, and I use more texture on the outer edges.
    I added a tiny bit of glitter dust to my family Christmas picture canvas and a friend told me her daughter made one with a lipstick kiss!

    DIY Mini Canvas with Wedding Photos by AndreaDozier.com
    DIY Mini Canvas with Wedding Photos by AndreaDozier.com
    DIY Mini Canvas with Wedding Photos by AndreaDozier.com
    DIY Mini Canvas with Wedding Photos by AndreaDozier.com
    DIY Mini Canvas with Wedding Photos by AndreaDozier.com
    Thanks to Mark & Jenn for stepping out at sunset of their Cincinnati wedding so I could capture that gorgeous moment of them!
    DIY Mini Canvas with Wedding Photos by AndreaDozier.com

    Prints $.45

    Canvas $1.00

    Easel $1.00

    Modge Podge about $8 {you will only use about a teaspoon of the bottle}

    DIY Mini Canvas with Wedding Photos by AndreaDozier.com
    Here’s a bonus image of one I made a year ago for my husband. I scanned an old photograph & had it reprinted.
    Love seeing his Grandma holding him next to my kitchen sink!
    They are great gifts for guys & you can make a few at a time so that you can switch them out seasonally.

    DIY Mini Canvas with Wedding Photos by AndreaDozier.com

    Here is a little behind the scenes video I made with the Vine App of this process:

    This is definitely not a new concept, but I hope someone feels inspired! ♥

    Find me on Vine // Instagram // Pinterest // Facebook // Twitter
    @AndreaDozier

    Pin It
    • alli - February 13, 2013 - 1:40 pm

      Absolutely love this! I always want to buy those little canvases at the store. The one with the old photograph is perfect. : )

    • Andrea - February 13, 2013 - 6:28 pm

      Thanks Alli! I was so drawn to them too, they are so versatile & adorable! One Christmas I made several of them with vintage photographs like this for gifts and it was so fun. Also love how easy it is to add new ones each season!

    • eric von lehmden - February 18, 2013 - 8:41 am

      That is so cool. I work with Canvas Press (we print photos onto canvas) and it is always great to see people’s creativity and enthusiasm for putting their own photos on canvas. Let me know if we can ever help with a project of yours or just give us a shout to chat about what we do. Great post!

    • […] and Forks: jessicaNdesigns Table Thank You Cards: WeddingsByJamie You might remember them from a Mini Canvas DIY I posted in February, check it out […]

    • Collin - May 1, 2013 - 11:12 pm

      You have shared an excellent DIY Mini Canvas for Wedding Photo, i like this unique idea, many thanks for sharing this great DIY project..

      how to find and appoint a good wedding photographer
      http://makeyourideasart.com/photography/how-to-find-and-appoint-a-good-wedding-photographer/

    Early Autumn and I’m afraid to admit that I worry about how we will do this.
    The three of us have something of a history together & we’ve become a petite little unit of our own.
    The task of being one in a more permanent sense makes the girl inside of me whimper.
    Thankfully, there isn’t a lot of time for that.

    Hungry boys.

    Tired me.

    Miles of monotonous driving each day.

    Homework.

    Emotions to soothe.

    Energy to release.

    Focus.

    Neverending chatter.

    They demand my complete attention.

    I don’t know if there is enough of me to divide myself & give them slices that will satisfy.

    As I’m preparing a delicious epicurean dinner,
    {boiling a box of noodles & heating a jar of spaghetti sauce},
    all of the pressure I’m under is making it hard to focus.
    Steam kisses my face. Boiling water lifts my spirit.
    I know the power of a timely meal.
    These exhausted pots & pans, we are old friends.
    They know my secrets & keep them in confidence.
    When I stand at my stove, I am in good company.
    Stirring noodles into golden halos…

    <<< LIGHTS GO OUT >>>

    I stop breathing for a moment.

    Not now.

    Not tonight.

    It’s not a good time to deal with a power outage!

    I don’t have the energy for this nuisance.

    Just as I am melting into submission to accept the fate of a dark night-

    <<< Laughter >>>

    The mischievous cackle of a familiar two year old breaks the silence.
    Damian Achilles.
    My little, wonderful, monster was the culprit.

    The light comes back on.

    I breathe again.
    I don’t know if I’ve ever been so euphoric to see those darn fluorescent lamps illuminate with their muddy yellow haze.
    Little hands little feet little mind working in sync while Mama is preoccupied.
    He was proudly standing on a chair flipping the forgotten switch from the other side of the kitchen.
    The three of us laugh endlessly as he flickers the lights on & off in a reprisal of his newfound trick.
    Deep giggles that send us spinning in a dance and wet my eyes from the sheer ecstasy of relief.

    That laughter, that night, in that old kitchen,
    has been sound of courage.
    We composed something I was afraid couldn’t exist.
    The echoes of our revelry nudge me through a drowsy winter that makes me ache to see over the grey.
    We thrive and there is a psalm of laughter we have penned to prove it.

    20130209-131752.jpg

    20130209-132815.jpg

    20130209-131745.jpg

    20130209-131725.jpg

    20130209-131733.jpg

    20130209-131738.jpg
    20130209-144545.jpg


    “Nobody whom this war has touched will ever be happy again in quite the same way. But it will be a better happiness, I think, little sister–a happiness we’ve earned. We were very happy before the war, weren’t we? With a home like Ingleside, and a father and mother like ours we couldn’t help being happy. But that happiness was a gift from life and love; it wasn’t really ours–life could take it back at any time. It can never take away the happiness we win for ourselves in the way of duty. I’ve realised that since I went into khaki. In spite of my occasional funks, when I fall to living over things beforehand, I’ve been happy since that night in May. Rilla, be awfully good to mother while I’m away. It must be a horrible thing to be a mother in this war–the mothers and sisters and wives and sweethearts have the hardest times.”

    Walter Blythe to Rilla Blythe in L.M. Montgomery’s Rilla of Ingleside

    I have always loved Anne of Green Gables, so this summer I read the whole series. Although I enjoyed all the books, I’m obsessed with Rilla of Ingleside. I have read it twice and started it again. I do really hope someone makes this movie & does it beautiful justice {in the art direction of Downton Abbey}. I think L.M. Montgomery was a brilliant observer & the characters she molded are amusing.
    I think she & I would be friends. Maybe in another life. ♥


    20130209-140757.jpg
       
    20130209-140750.jpg
       
    20130209-140805.jpg

     Self Portraits iPhone 4 New Year’s Day | All Others Nikon D800


    Pin It
    • Jaclyn - February 10, 2013 - 1:13 pm

      🙂 In response to your comment from our other post…

      You’re very welcome!!! Although our world is CONSTANTLY full of distractions, I admire you taking time to have a “normal” dinner in the midst of life and all it throws at us daily. Your sweet boys will always remember those moments (and you will too)…

      And I will have to find this “Rilla of Ingelside” that you speak of…;) Thank you for jogging my memory – I now remember finding that there were additional books after the 4-6 series back in the fall and was going to buy the 7-9 and they didn’t have all three, so I didn’t buy any. I will not have to venture to my favorite place soon and find that…:) Not too much longer and we’ll be back to warmer temps and SUN!!! I wish it would hurry!!!!!

    • Kara - February 10, 2013 - 5:06 pm

      “Is it Rilla my Rilla? “Yeth”….
      I would haft to say this book in the series is one of the best.
      Walter…sweet Walter…
      Thinking of you as Hold your fort down day after day…
      (Your kitchen looks lovely in your photos & your cooking…)
      Thanks for sharing your words & snippets of your life…
      Xo
      Kara

    • Andrea - February 13, 2013 - 1:22 pm

      Kara, I love that sentence! Thanks for your words about my kitchen! It’s grown on me, but I still dream of a fresh coat of paint & a new floor! 🙂

    • Andrea - February 13, 2013 - 1:24 pm

      Jaclyn, I read them on my phone/iPad and most of them are free! I love finding classic books to read! And I agree, the sun can come and stay as soon as possible! Some warmer weather would be a treat!

    This recipe is a staple in our family. I believe it originated as a Pampered Chef recipe from my sister, and soon evolved into a family staple at all occasions. It is the reason I started to eat black & pinto beans, because I never ate them as a child. I’ve also heard other people say that even though they don’t care for beans, they do like this fresh & easy salsa. It is only a few ingredients and the cilantro gives it a fresh appeal. Especially at winter gatherings like that superbowl party coming up.

    I made it for a Thirty One Party this past weekend & many people asked for the recipe so I thought I’d share it here.
    I’ve modified it a bit since I like sweet flavors, so this is just a slight variation from the original one.

    The guys in our family add Chipotle Tabasco sauce & sometimes we add jalapeños for a kick. I love recipes like this that you can modify very easily to suit your tastes or the occasion.

    Super Bowl Salsa Easy Recipe by AndreaDozier.com

    I double the original dressing since I want to have my salad smothered in it:

    Sweet Dressing

    Whisk all these ingredients until combined. Refrigerate until ready to add.
    Can make a couple days ahead of time {flavor gets better over time, just re-mix when ready to use}.

    I Cup White Vinegar

    1/2 Cup Light Olive Oil

    2 tbsp Sugar

    2 tbsp Cumin {I usually drench mine in this}

    1 tsp Dry Oregano Leaves

    1 tsp Salt

    1 tsp Pepper

    Salsa

    Rinse and drain beans and corn. Chop onion, pepper, and cilantro. Mix together in a large bowl.

    Two Cans of Black Beans {Rinsed & Drained}

    Two Cans of Pinto Beans {Rinsed & Drained}

    Two Cans of Corn {Rinsed & Drained}

    One Sweet Onion, Chopped

    One Green Pepper, Chopped

    About 2 tbsp of Fresh Cilantro, chopped finely. I don’t like cilantro stems so I always make sure to just use the leaves.

    Drizzle the dressing over the salsa mixture.

    Enjoy with a bag of your favorite flavor of tortilla chips.

    Super Bowl Salsa Easy Recipe by AndreaDozier.com

    The leftovers are perfect for lunch, by spoon or used in a tortilla with meat {like Chipotle’s corn salsa}.
    I love that I now have a reference for this recipe, as you can see the original {above} from 2005. ♥

    {iPhone 4 images & edited with Afterglow App }


    Pin It